
News and Articles are one of the important section to inform, entertain, and provide a service to readers. They are designed to amuse or give enjoyment to readers, and these stories often have opinions of the writer. It also provide information that helps readers solve their business, or daily living problems. So webShaper will help you on how to create your own news and articles inside your store.
1. Firstly, open webShaper control panel and click Publish.

2. In Publish Manager section, there are 2 managers function which is:
Manage News: To create, edit or delete News
Manage Articles: To create, edit or delete Articles
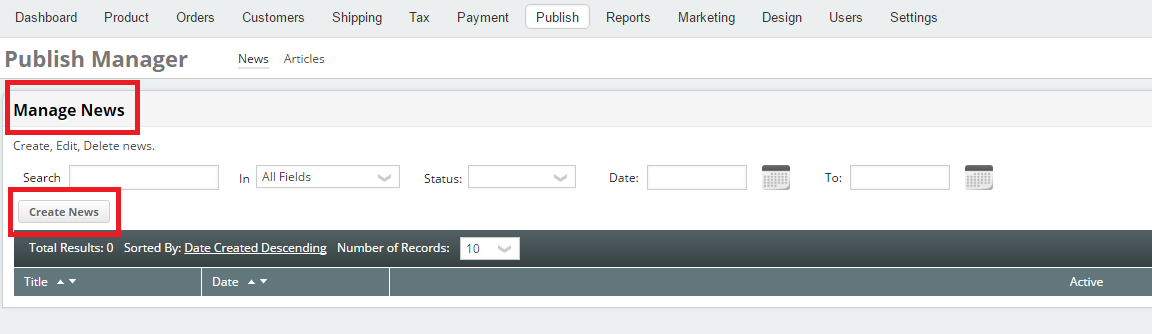
3. At Publish Manager section, you can select to view all your news status inside your store, whether it is Active or Inactive by clicking at the Status drop down button.
Please follow the step by step instructions for you to Create, Edit or Delete News and Articles inside Your Store:
1. How to Create, Edit or Delete News
2. How to Create, Edit or Delete Articles
How to Create, Edit or Delete News
1. For you to create News inside your store, click News and then Create News button at Manage News.
2. Make sure you fill up the Title, content of your news, and also Date.
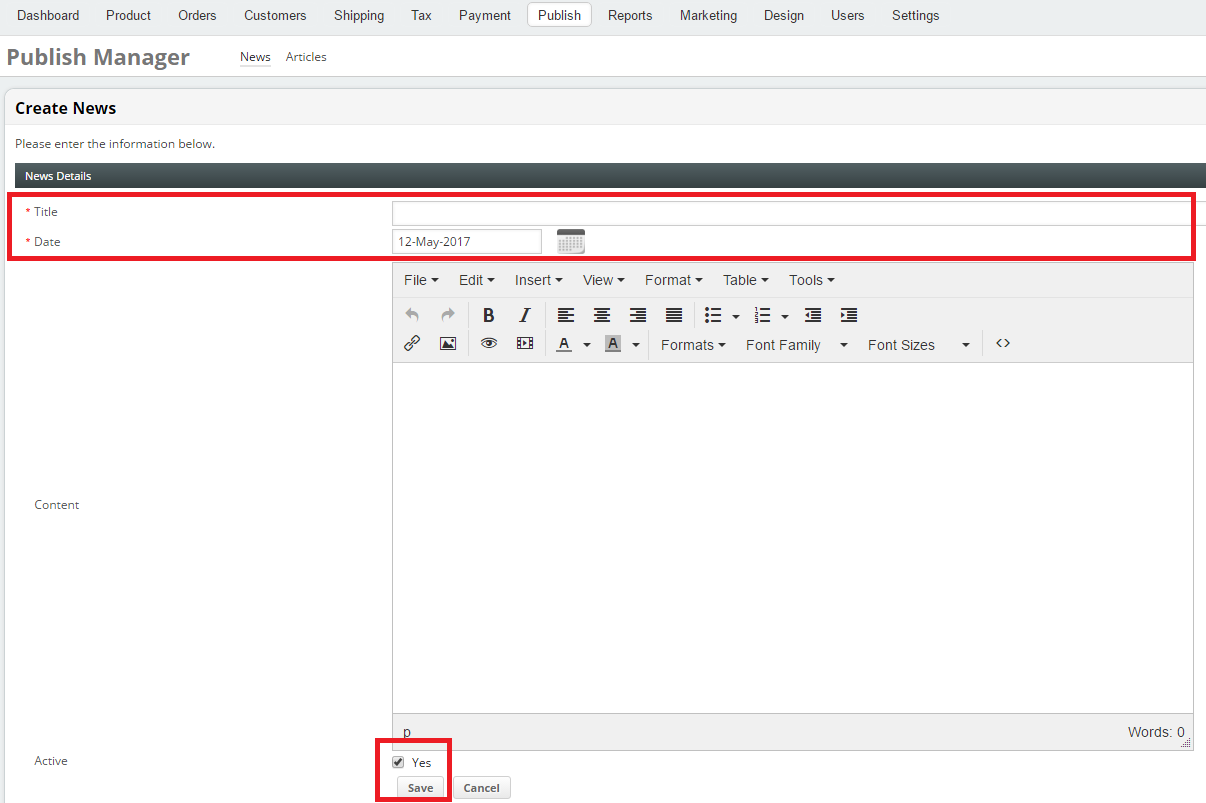
3. Tick the status button to make it Active. Then click Save.
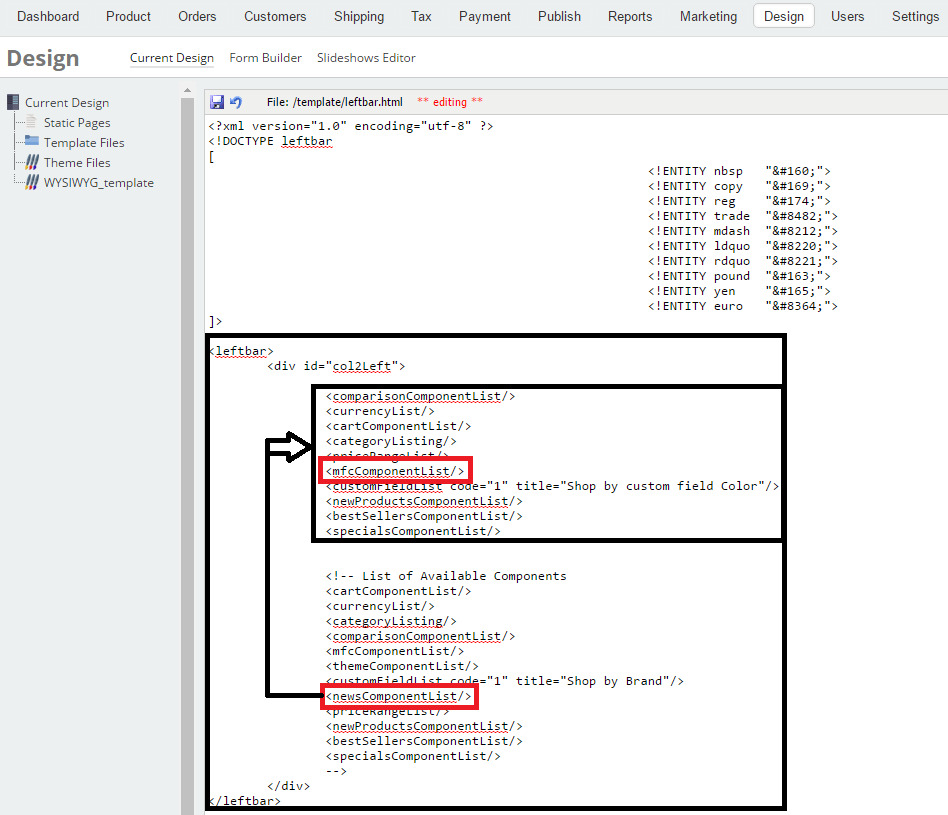
4. Meanwhile, usually customers want the News button to be able to be seen at the leftbar of your store.
So in order to do that, go to webShaper control panel, click Design > Template Files. Choose leftbar.html and click Edit.
Copy the <newsComponentList/> at the below and paste them at the top of the <mfcComponentList/>.
Then click Save icon.
How to Create, Edit or Delete Articles
1. Inside the Manage Articles section, there are 2 buttons which are Create Articles and Manage Category.
Manage Category button is basically to create a new category inside an article.
2. For you to create an article inside your store, click Articles and then Create Articles button at Manage Articles.
3. Make sure you fill up the Title of your news, Category, content and also Tag.
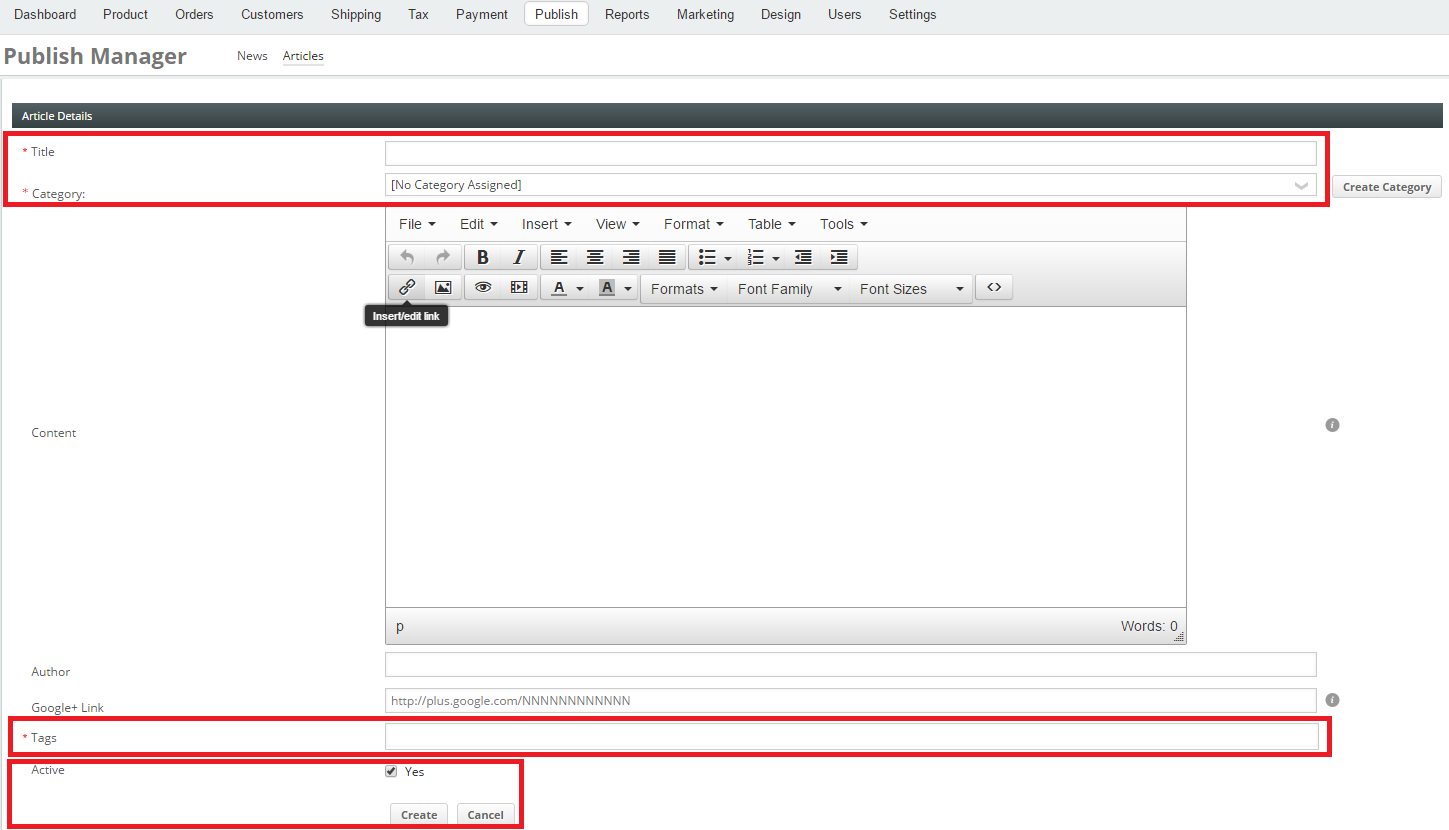
4. For article category, you can choose the existing one or create a new one by clicking at the Create Category button.

5. Insert your new category name and its parent. Click Save.
6. Tick the status button to make it Active. Then click Save.
7. You can use your trial store URL as yourdomain.com then continue with /webshaper/store/articles.asp
You will see the front-end of the article:
- Article: yourdomain/webshaper/store/articles.asp
- News: yourdomain/webshaper/store/news.asp
8. After updating news or articles on your webShaper control panel, just refresh your store to make sure the changes you made are successful.