
To update your product stocks, prices or images through bulk upload inside your webStore store, make sure your Microsoft Excel file is under .xlsx format.
1. Go to your webShaper store control panel.
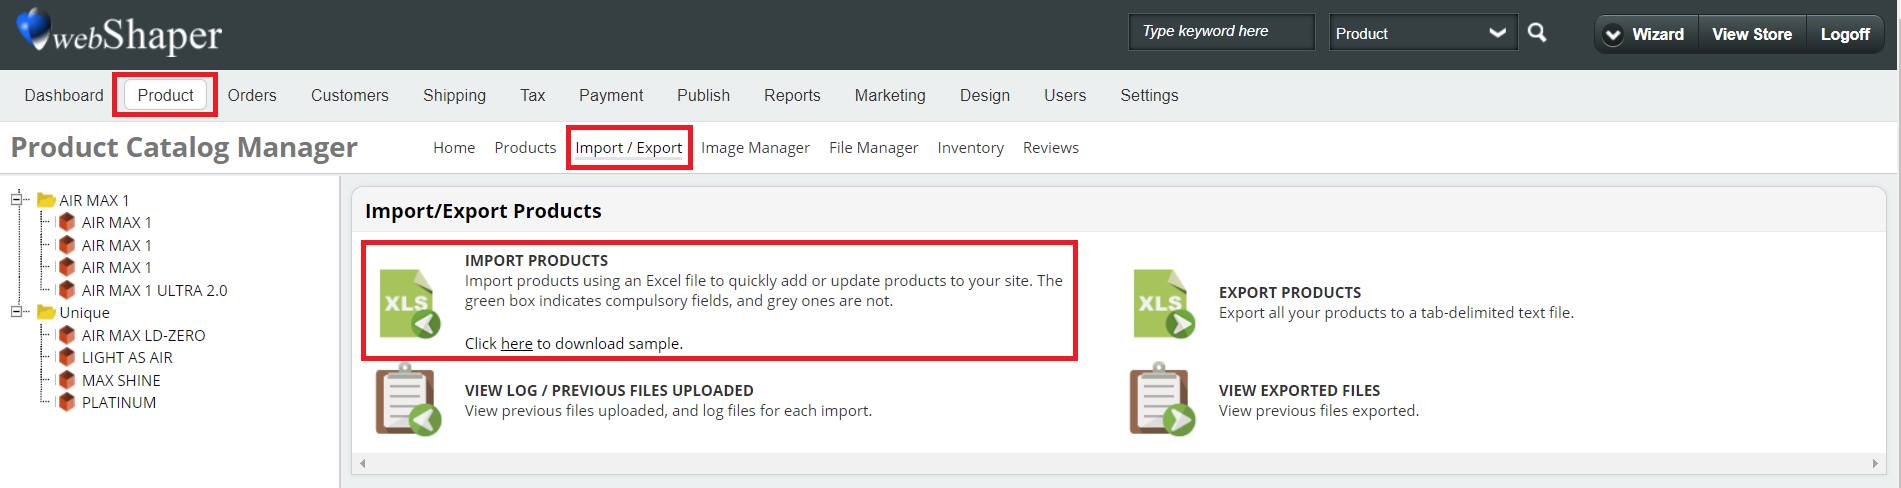
2. Go to Product.
3. Click Import/Export .
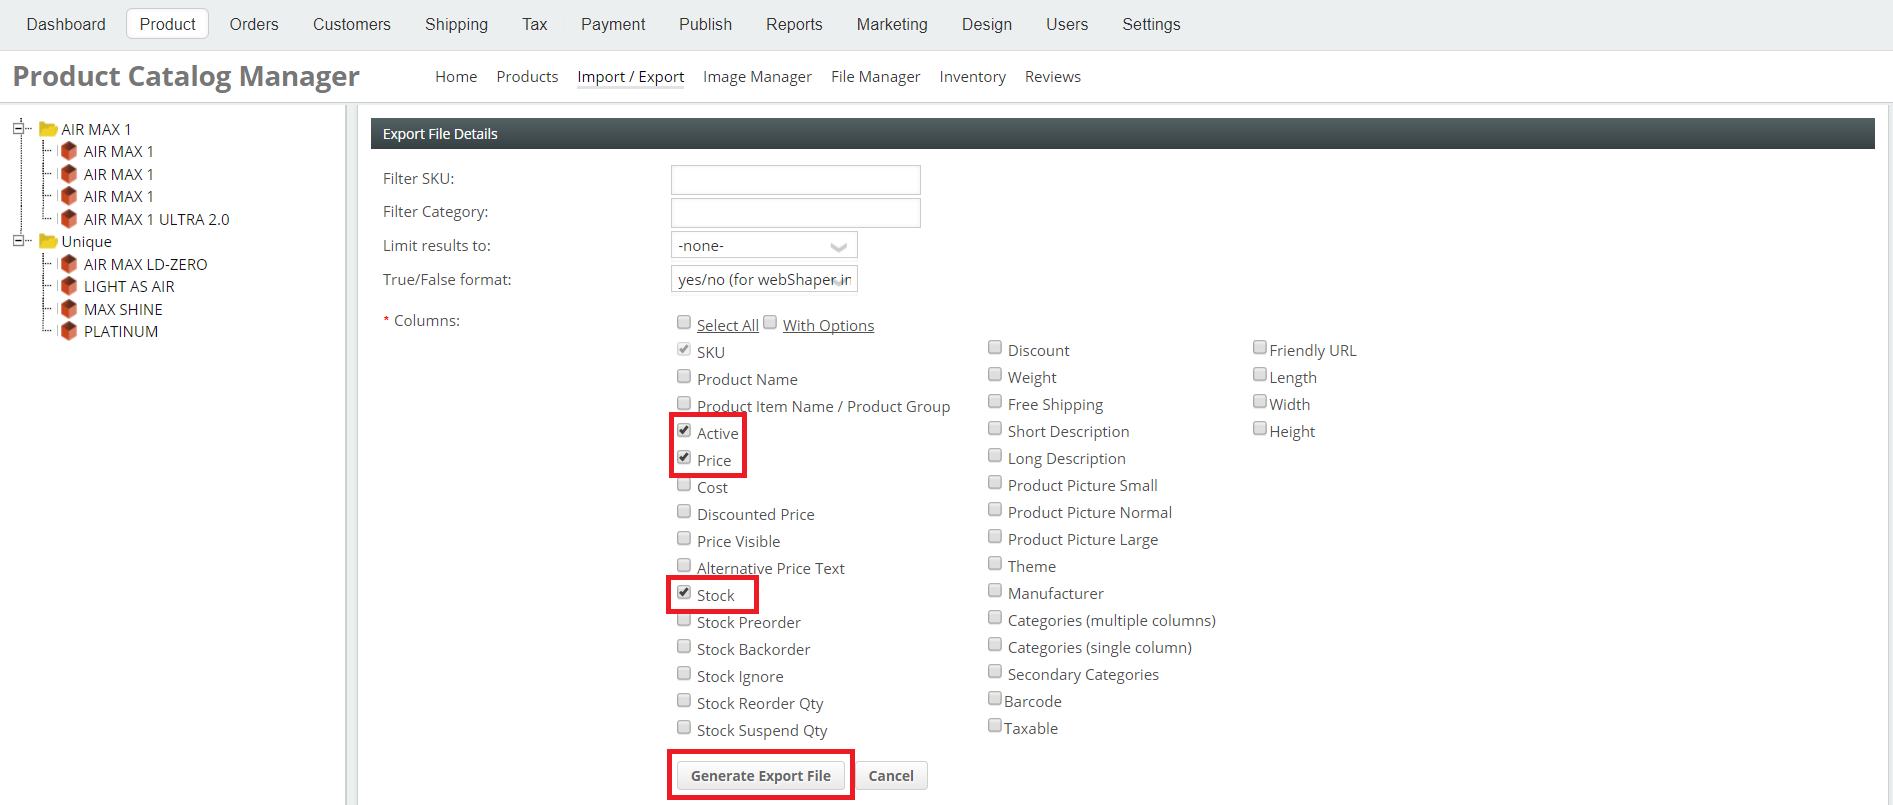
4. Click Export Products.

5. On Export File Details section, tick on product Stocks or Prices, according to which field you want to update. Take note that always tick Active because the system will know your product status.
6. Click Generate Export File.
7. Now your Export Product is Complete. Right click on the filename link:
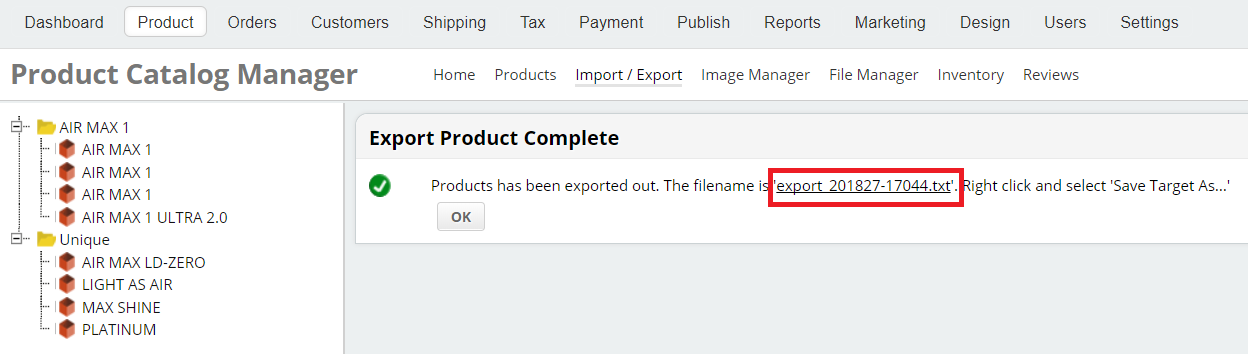
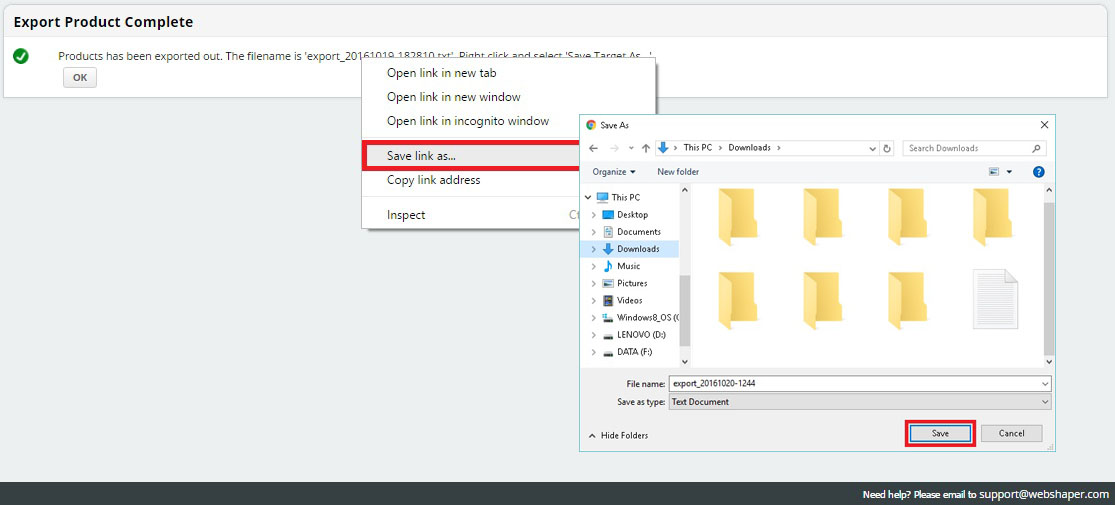
8. Select Save link as…
9. Click Save
10. Open Microsoft Excel
Note: Using online excel or other software may face an issue when importing the file back to webShaper
11. Drag the export file on Microsoft Excel
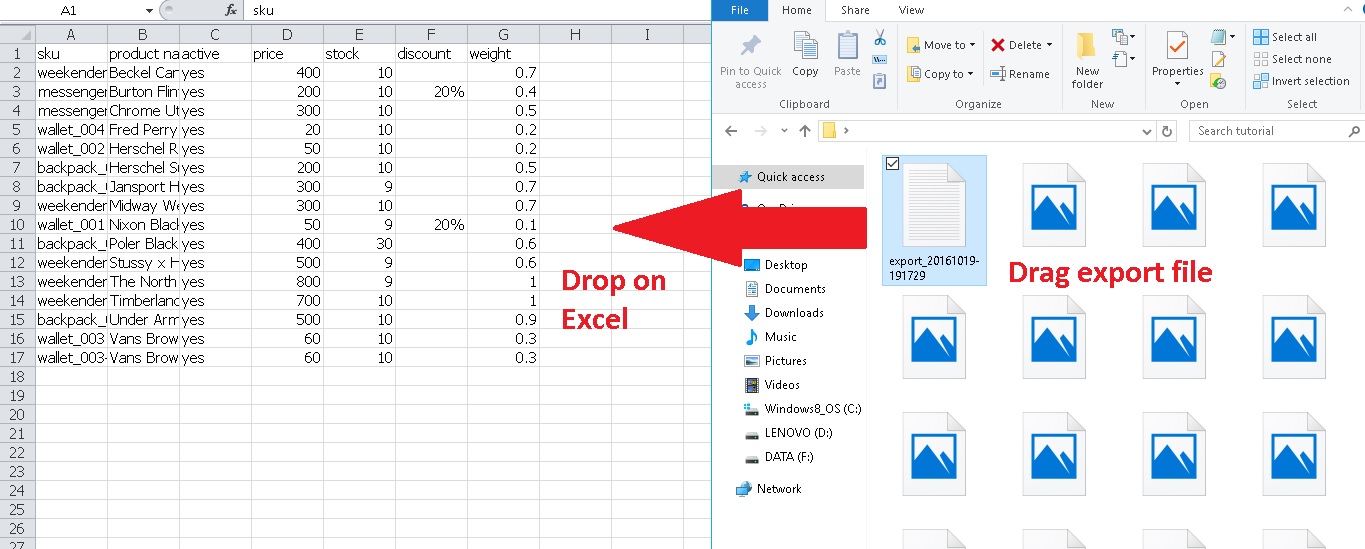
12. Make changes as you like
13. Click File
14. Select Save as
15. Choose Save as type: “Excel Workbook”
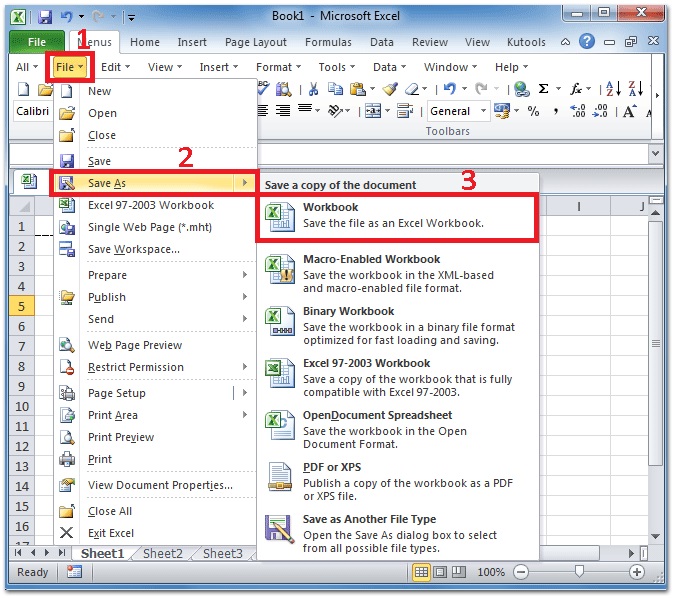
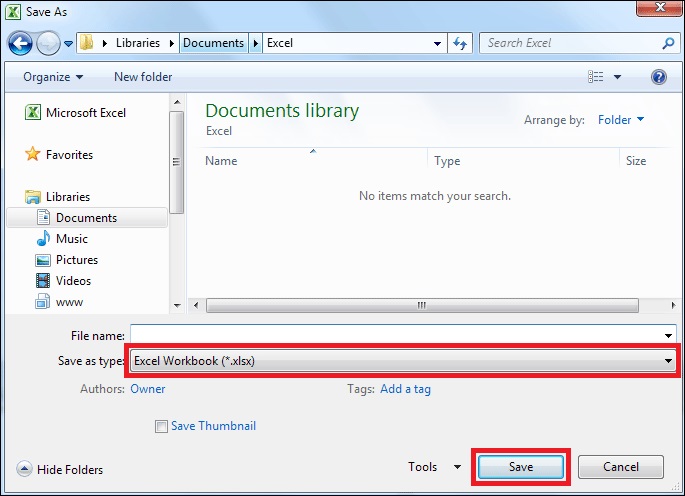
16. Click Save
17. After you have done your with fill in your Excel File, go to your webShaper control panel. Go to Product > Import/Export > Import Files.
18. Choose file you want to import inside your computer by clicking File.
19. Tick Excel type. Insert your Worksheet file name.
20. On the Option section, choose Update Products to add new bulk upload products inside your webStore.
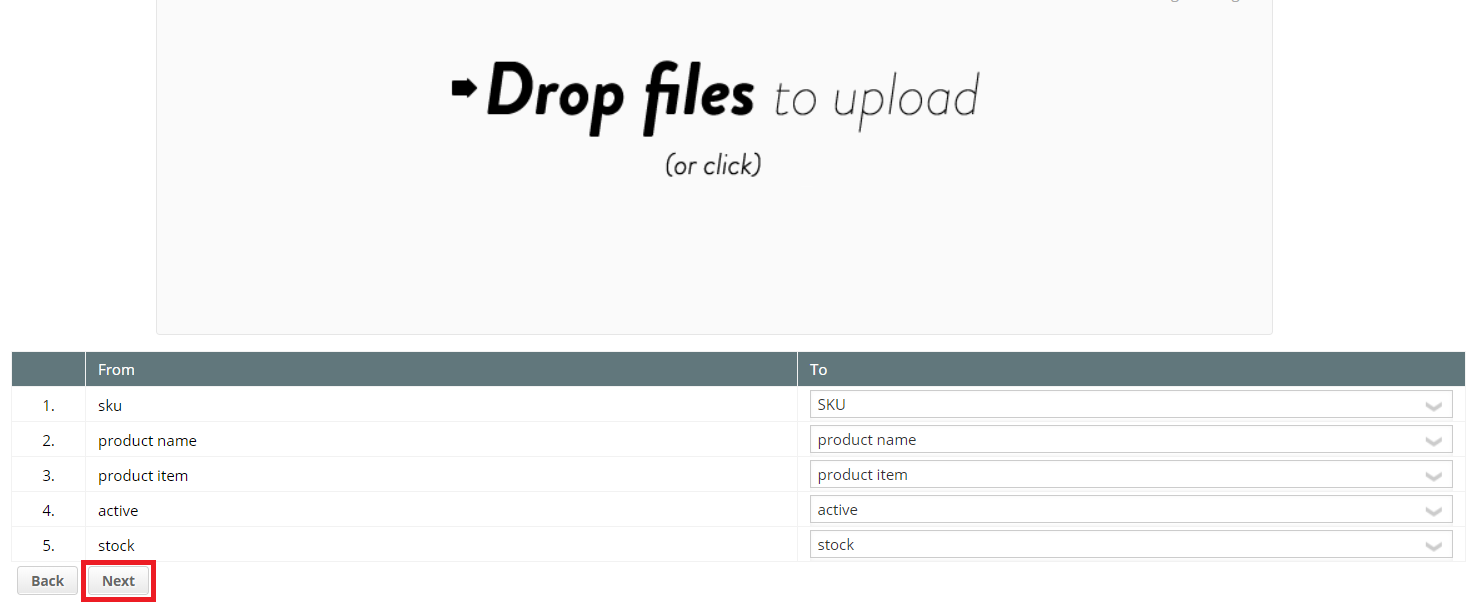
21. Click Next and the system will update Success! File Uploaded status.
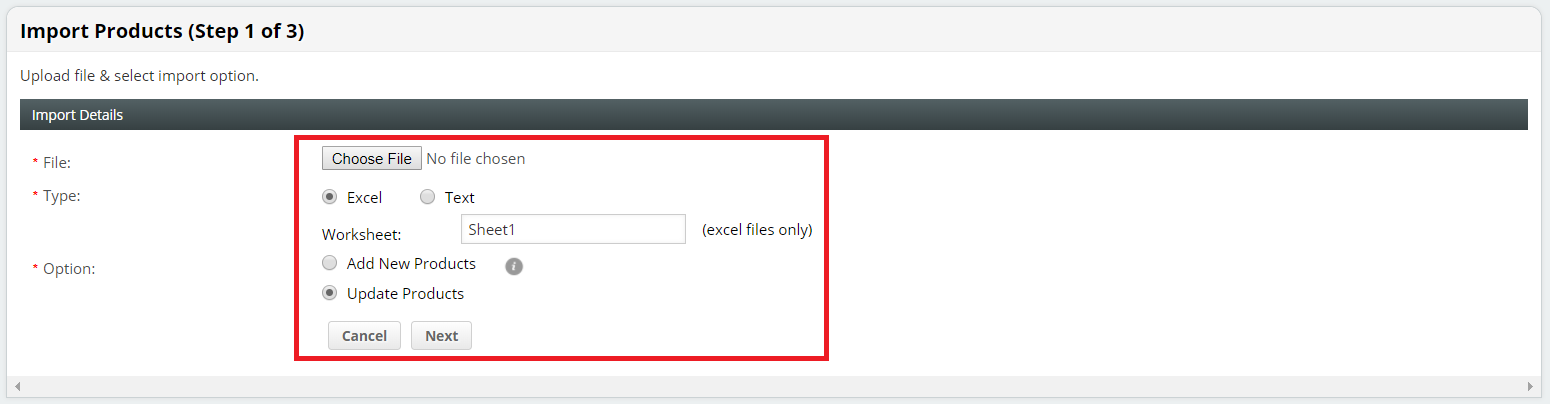
Note: You have to make sure your Worksheet name is correct.
You can find the sheet name at the bottom left of your Excel file.

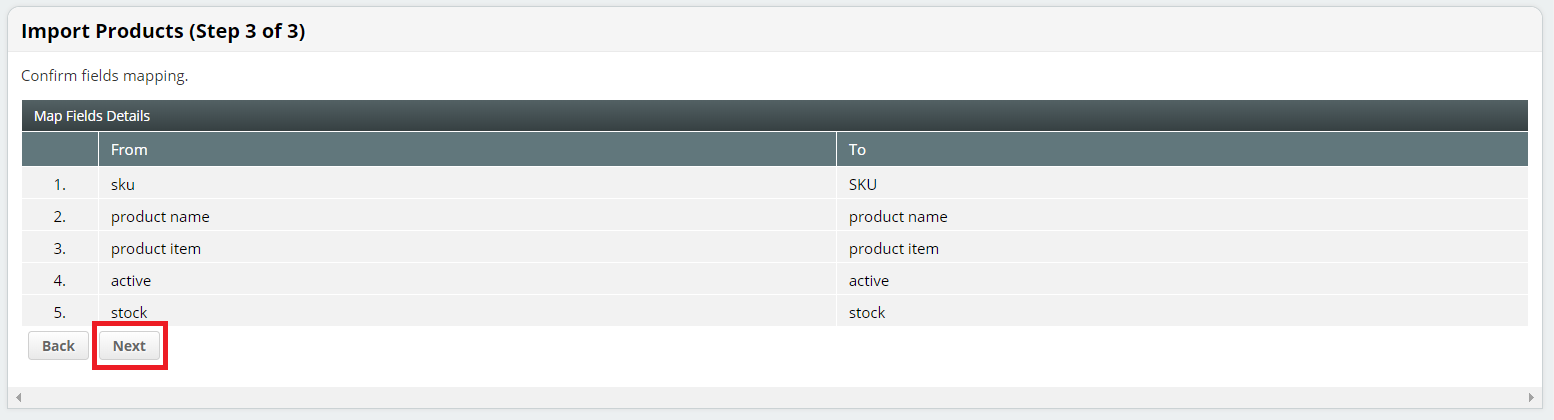
22. Click Next.
23. Click Next.
24. Now your new products upload are successfully updated inside your webShaper store.

25. You can go to the link here on how to simply bulk upload your images.