If you wish to collect more customer information, custom field is the answer. This custom field will create more fields on sign up form to gather more detail about customer.
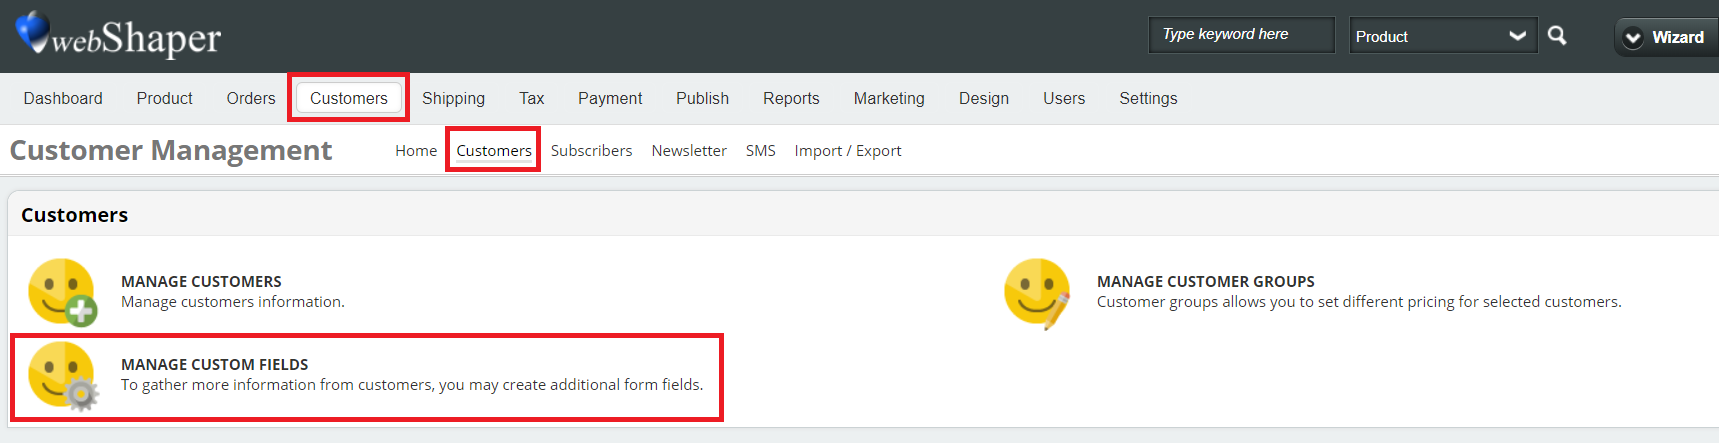
1. Go to Customers (Main).
2. Click on Customers (Sub).
3. Select MANAGE CUSTOM FIELDS.
4. Click on Add.

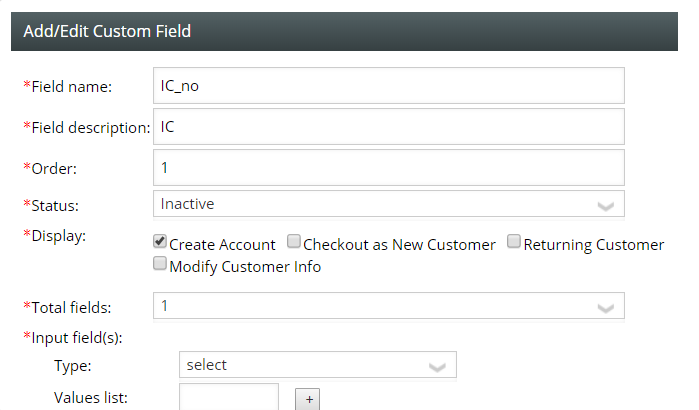
5. Key in details such as:
- Field Name: Custom field name.
- Field Description: Custom field description.
- Order: Custom field order on Manage Custom Field section.
- Status: Status of custom field; either Active or Inactive.
- Display:
i. Create Account: Custom field will appear when customer create an account with your store.
ii. Checkout as New Customer: Custom field will appear when new customer wants to checkout from your store.
iii. Returning Customer: Custom field will appear when returning customer wants to checkout from your store.
iv. Modify Customer Info: Custom field will appear when customer wants to modify their info on checkout page. - Total fields: Only 1 to 4 fields is/are allowed to create.
- Input field(s):
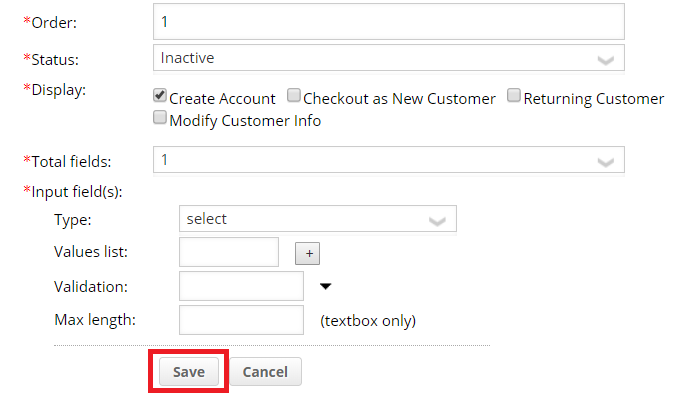
i. Type: You can choose either; textbox, textarea, checkbox, radio buttons, or date.
ii. Values list: You can add and delete your values list.
iii. Validation: You can choose either; alphanumeric, date, email, integers, required, or URL.
iv. Max Length (textbox only): Length of custom field textbox.
6. Click on Save.
Explanation of Type and Validation
| Type | Description |
|---|---|
| Check Box | A small box that allows user to tick or mark as the response to a question. |
| Drop Down List | A list box that allows user to choose one value from the list. |
| Option Button | A small button that allows user to choose only one of a predefined set of options. |
| Text Box | A single-line text box intended to enable user to input short information. |
| Text Area | A multiple-line text box intended to enable user to input long information. |
| Format | Description | Example of valid input |
|---|---|---|
| None | No restriction for user input | 44-5, Jln 5/101C, Cheras |
| Alphanumeric | Allows user to input alphabetic and numeric characters only. (No spacing & no Uppercase) | abc123 |
| Date_ddmmyy | Allows user to input calendar date. (day/month/year) | 16/02/2012 |
| Allows user to input e-mail address | support@webshaper.com | |
| Integers | Allows user to input whole numbers | 0391305218 |
| URL | Allows user to input a web address | www.webshaper.com.my |
How it displays on registration form
1. Create Account.
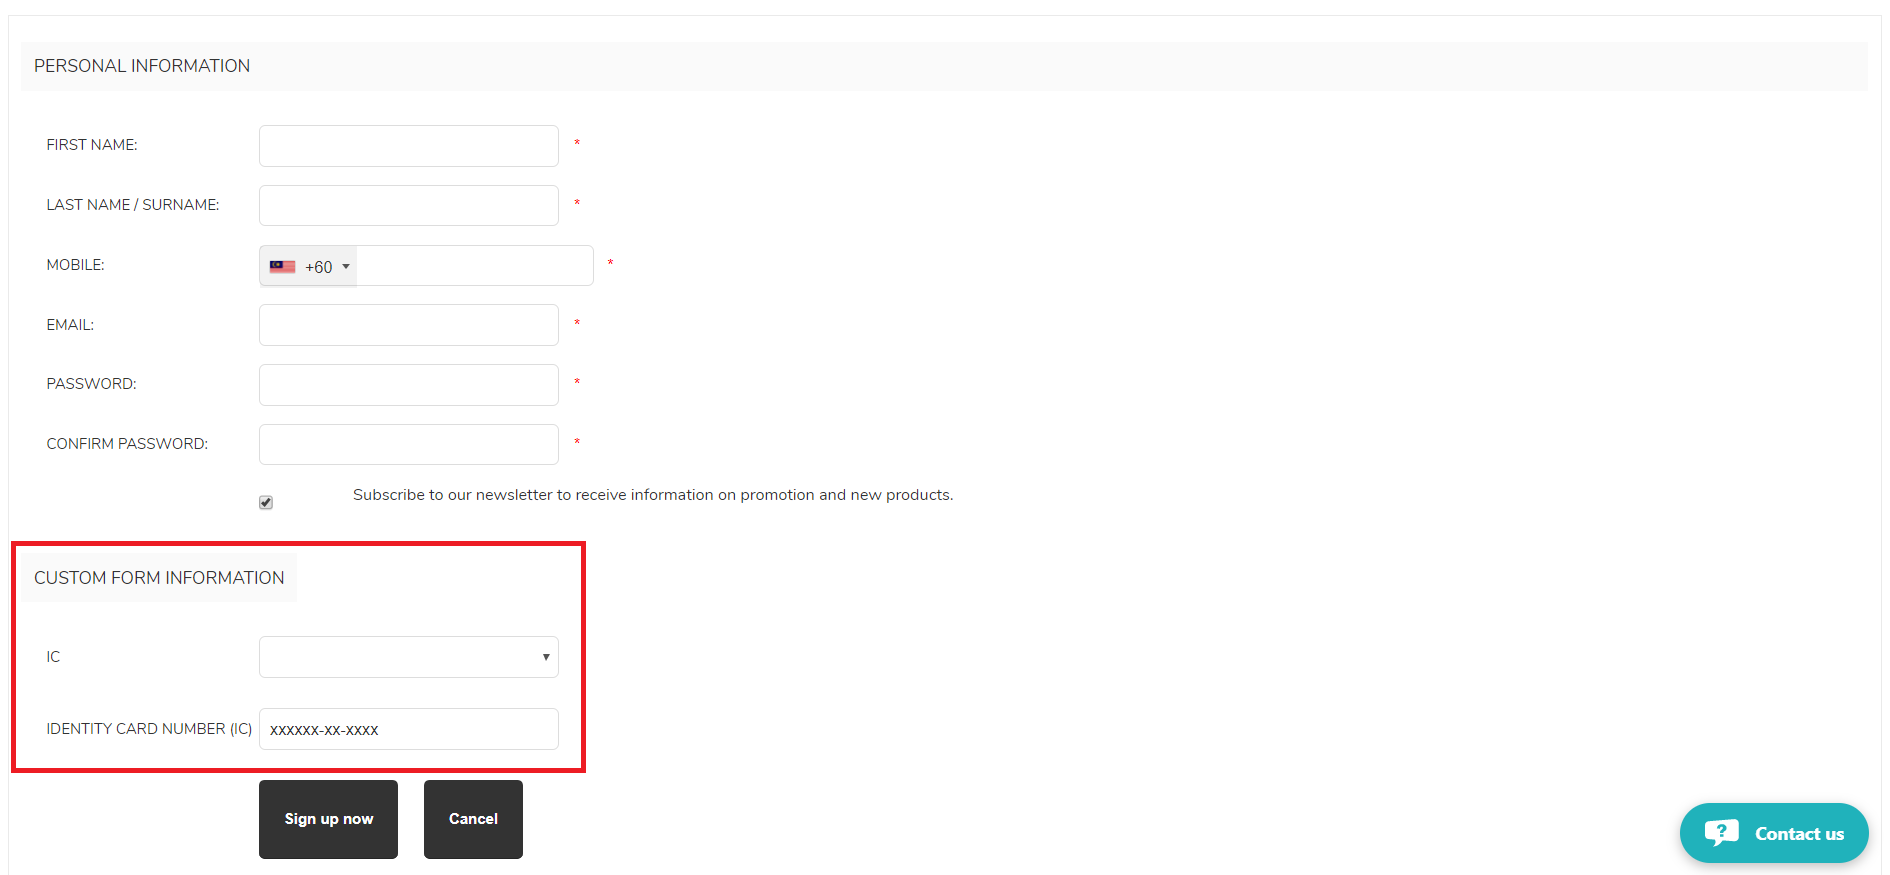
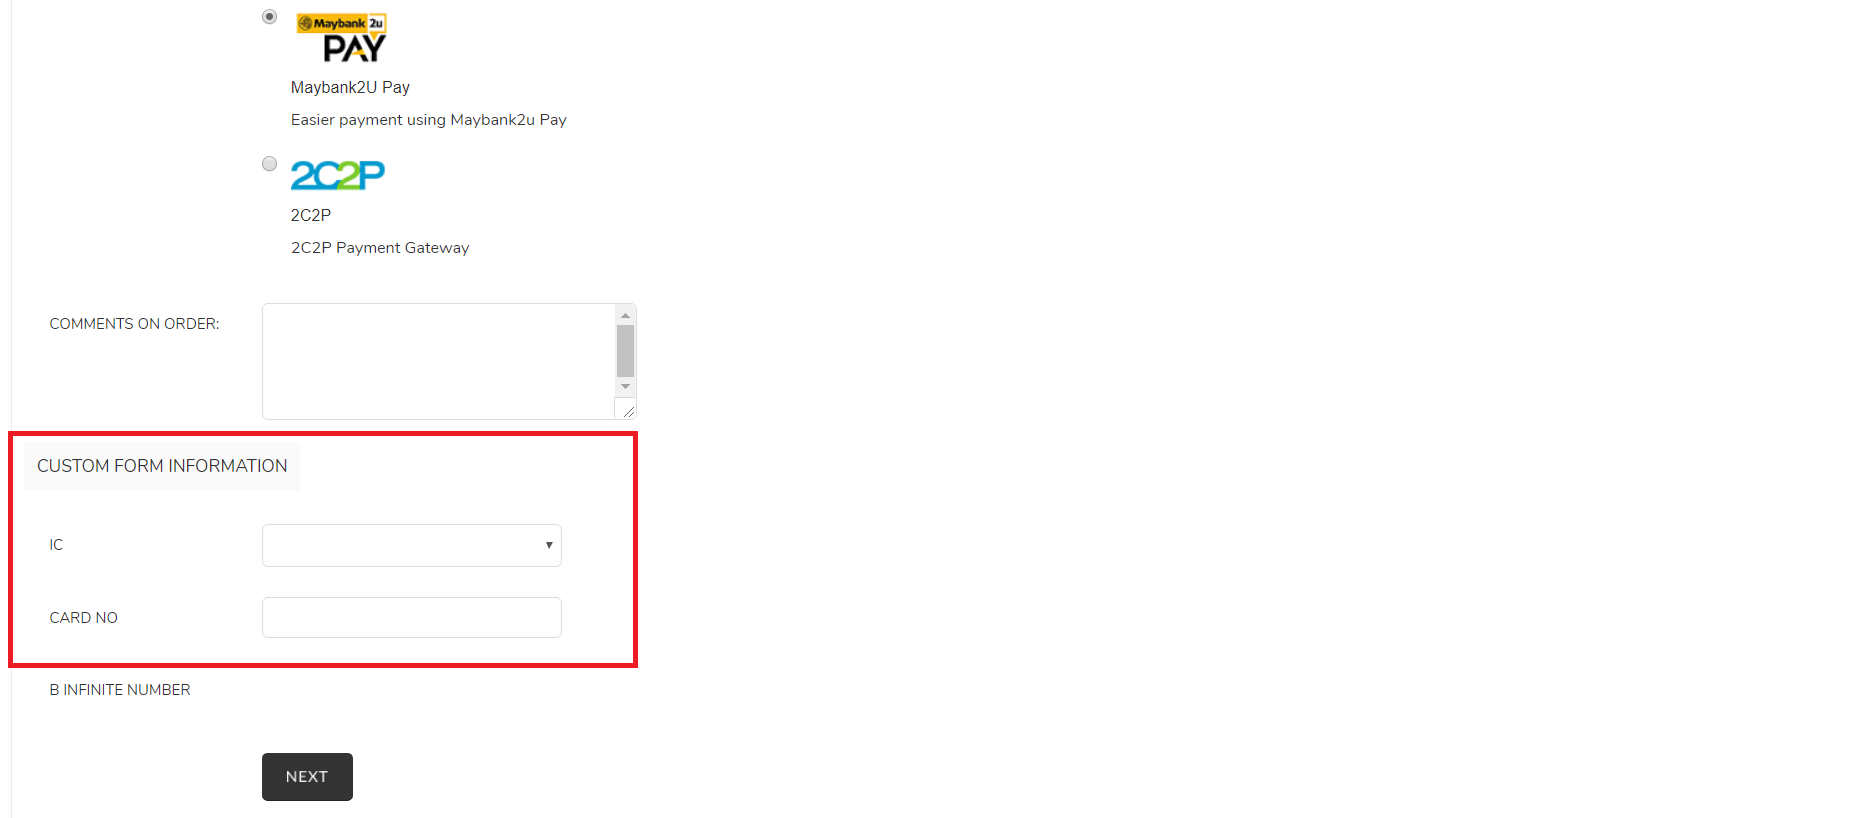
2. Checkout as New Customer.

3. Returning Customer.
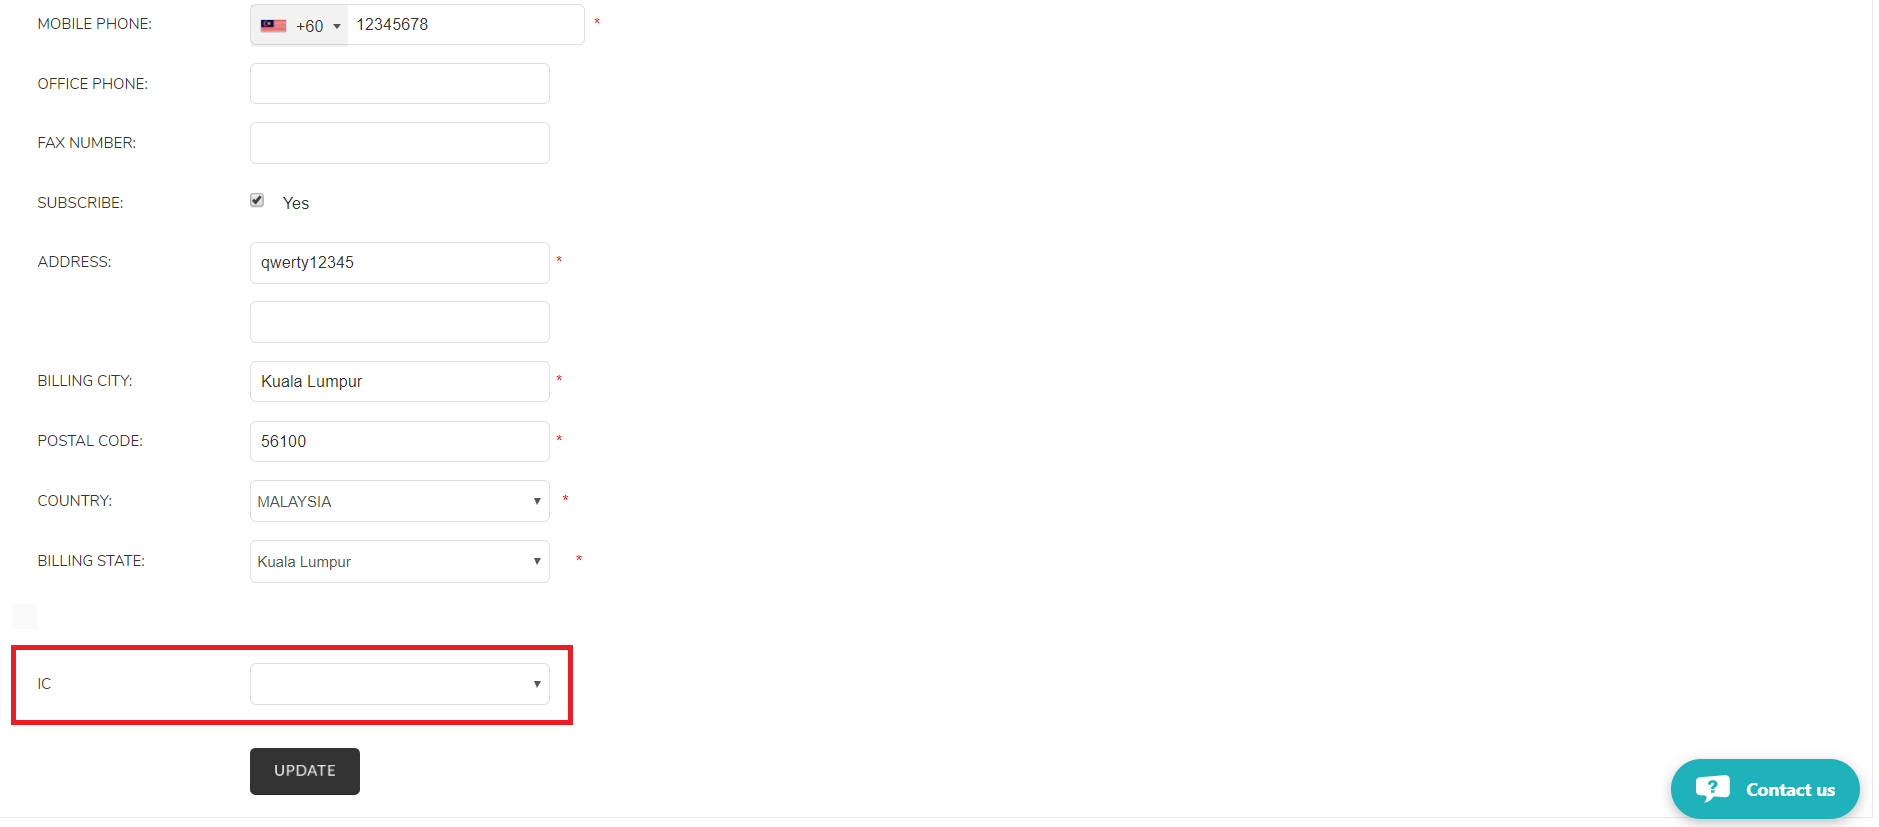
4. Modify Customer Info.
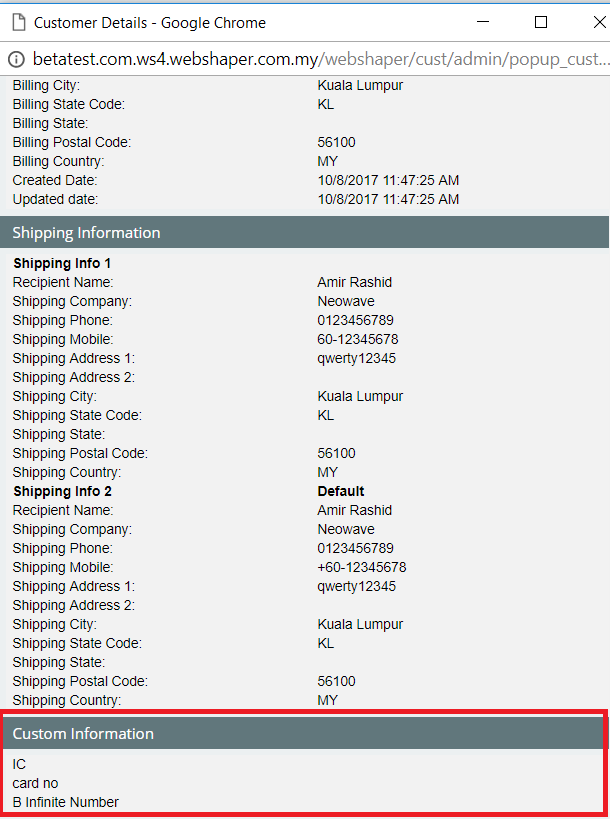
Where to view the custom field data
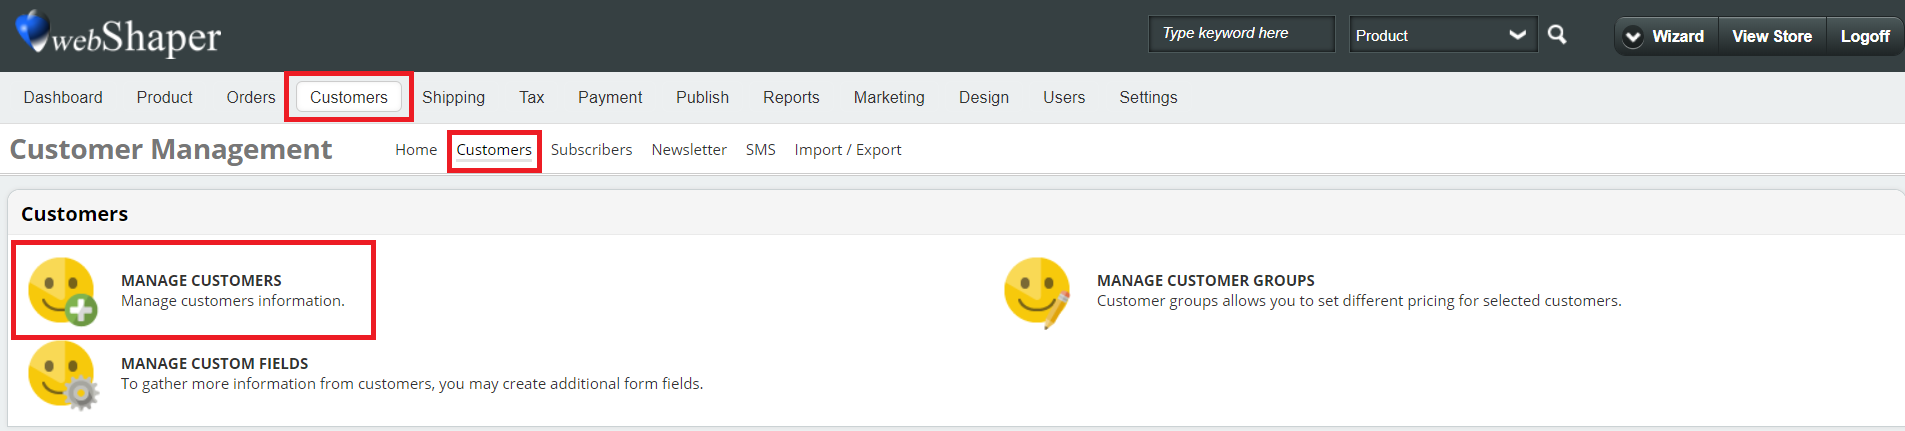
1. Go to Customers (Main).
2. Click on Customers (Sub).
3. Select MANAGE CUSTOMERS.
4. Select View Customer Details on customer you want to see.

5. Scroll down to the bottom.