
In case you would like to run a promotion just like any physical shop, you can do it too on your webStore to boost sales. To do that:
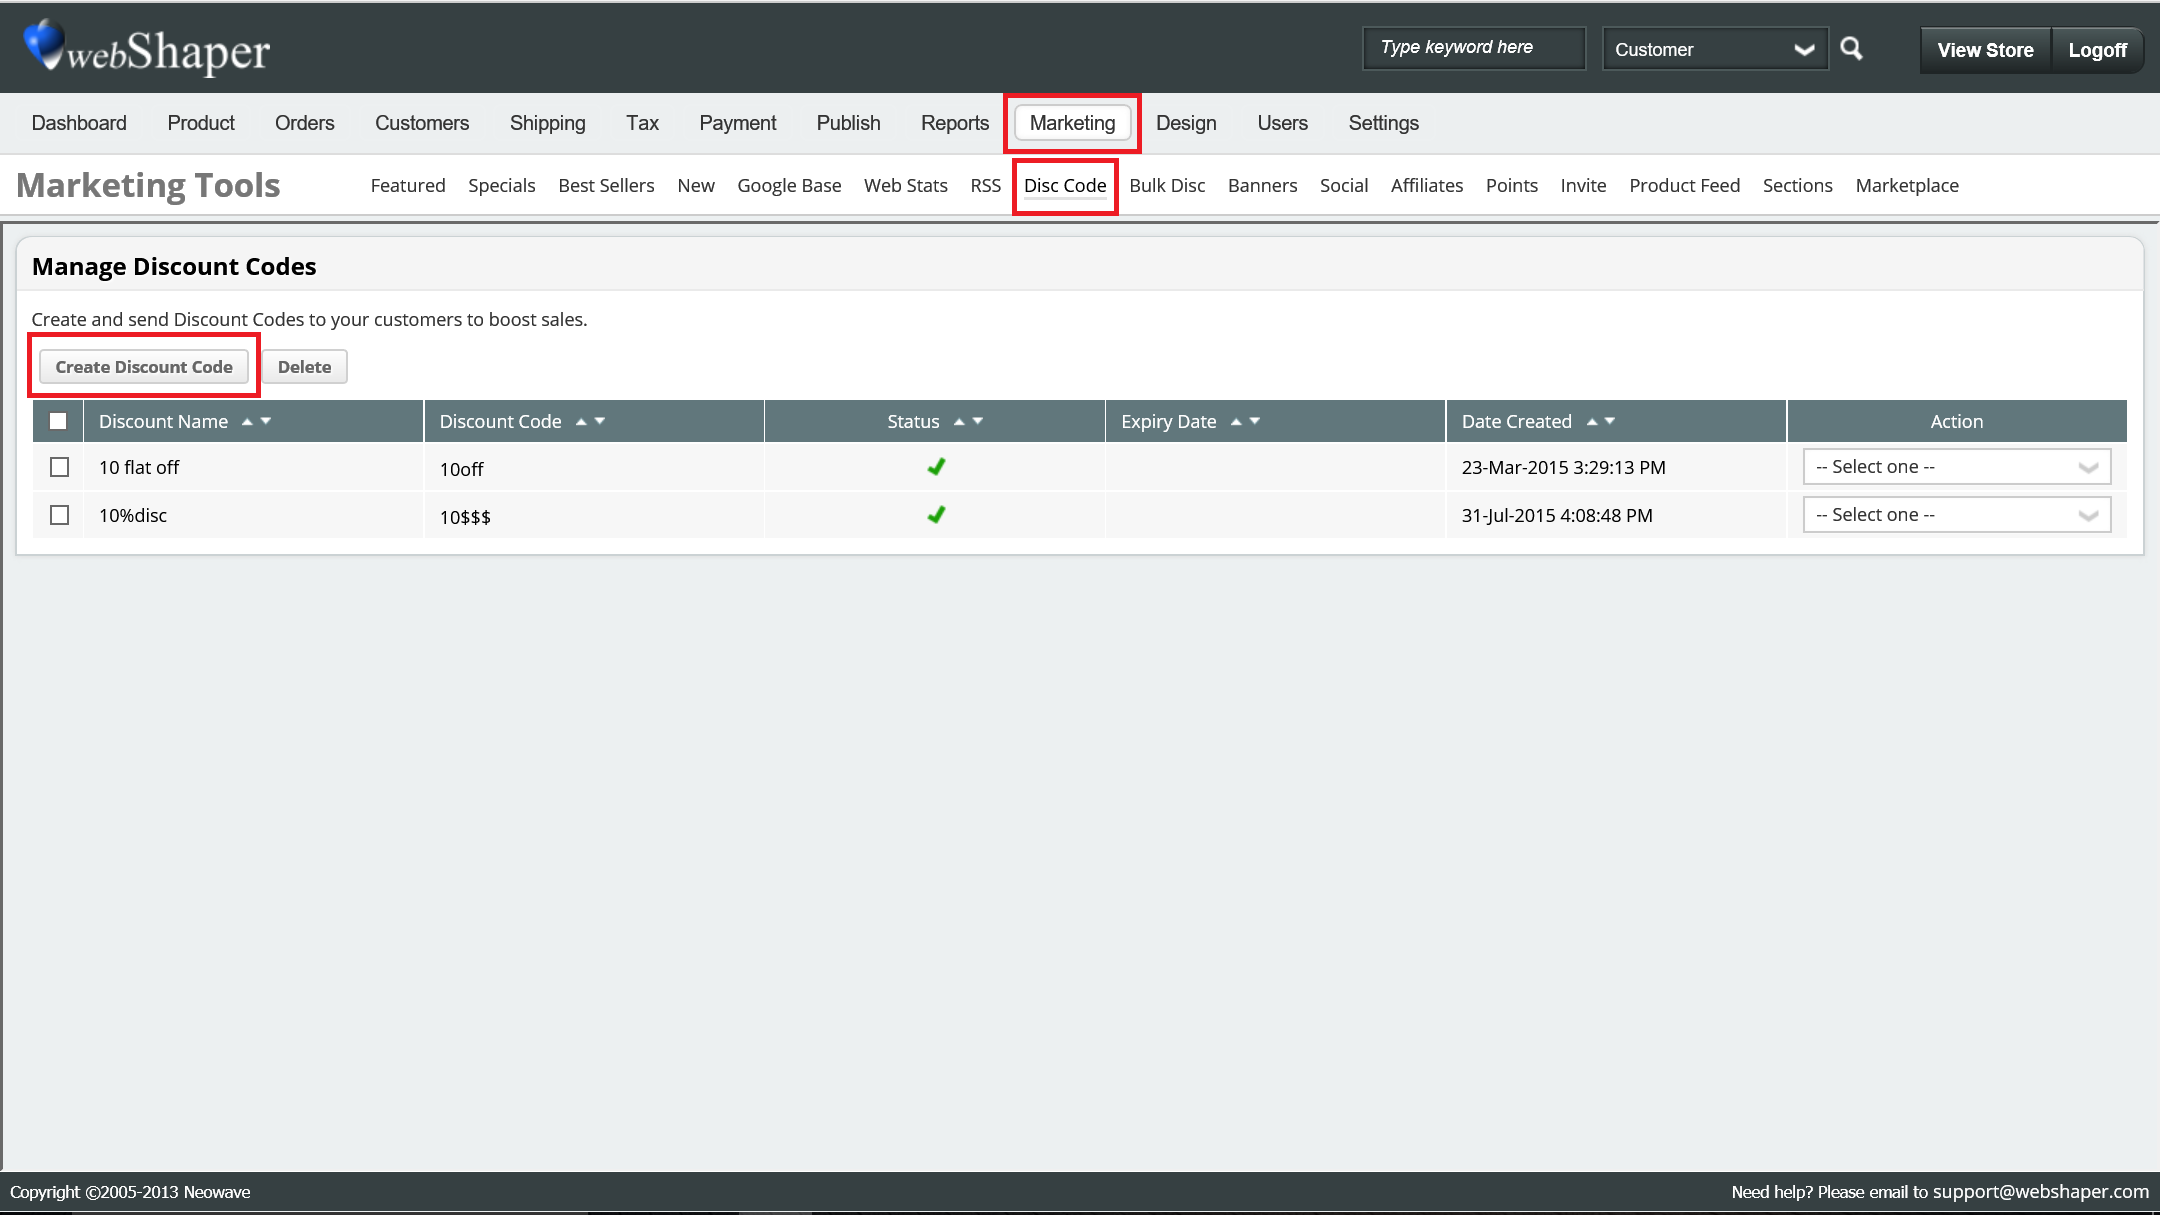
1. Go to Marketing.
2. Click on Disc Code.
3. Under Manage Discount Code, click on Create Discount Code.
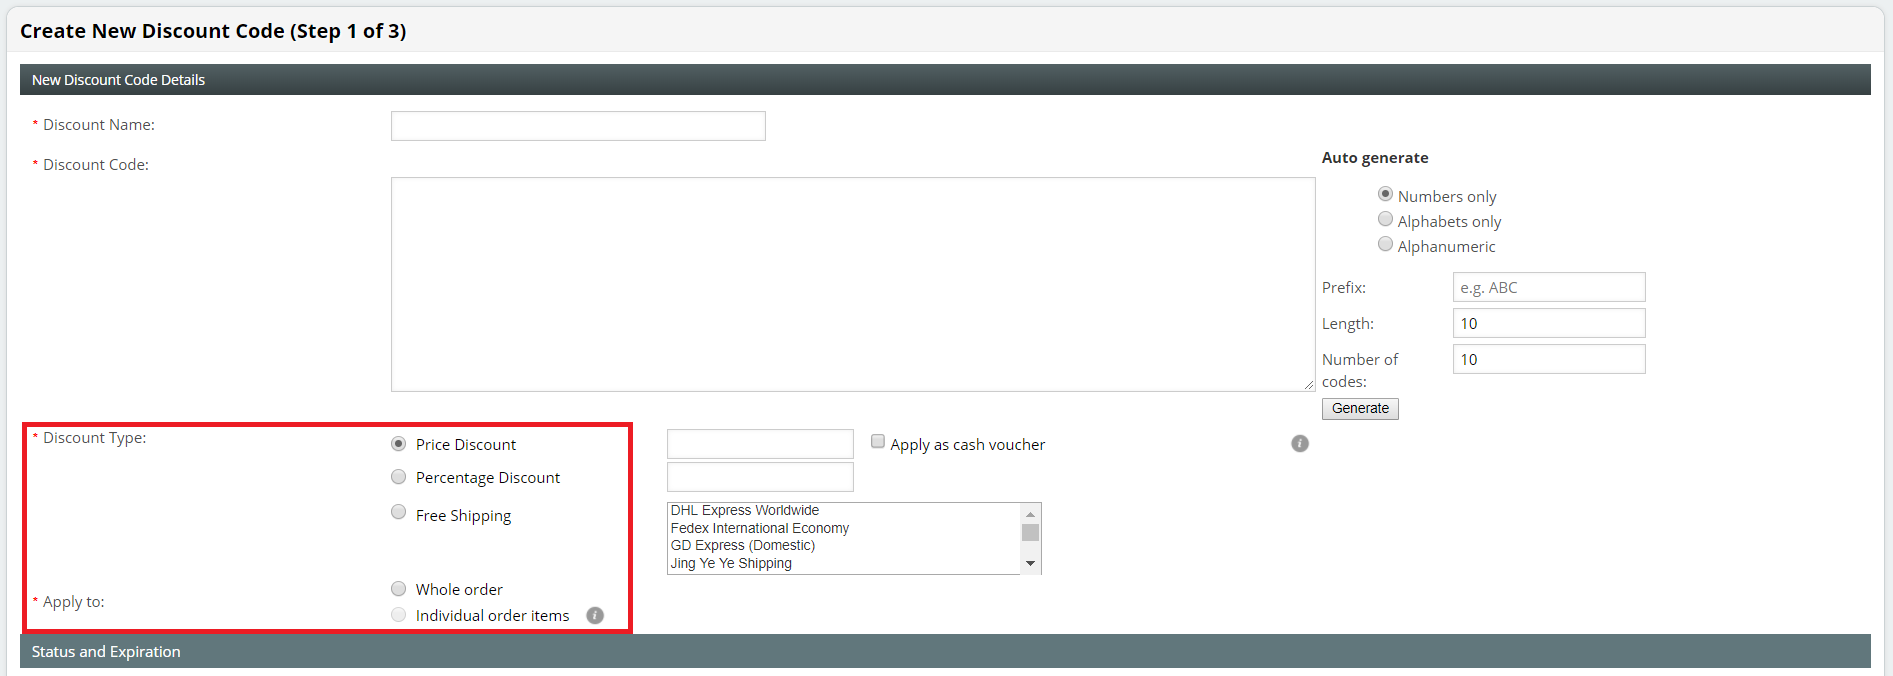
4. Under New Discount Code, enter your Discount Name and set your Discount Code. You can use the Auto Generate to generate random discount codes instead of creating your own code.
5. Select your Discount Type that you would like to give to your customers. Discount Type includes Price Discount, Percentage Discount and Free Shipping.
6. The next step is to select either the Whole Order or Individual Order Items for Apply to.
- Individual Order Item : Discount applies to individual order items.
i. If product restriction is selected, only items selected will qualify for discount.
ii. E.g. Product A (under Product Restriction) is add to cart. After that, Product B is added (which is not under Product Restriction). The whole order CAN be checkout using the discount code, with or without Product Restriction.
iii. If both product under Product Restriction, the whole individual order item also CAN be checkout using the discount code successfully. - Whole Order : Discount applies to order subtotal.
i. If product restriction is selected, all items in cart must be qualify for discount.
ii. E.g. Product A (under Product Restriction) is add to cart. After that, Product B is added (which is not under Product Restriction). The whole order CANNOT checkout using the discount code, with or without Product Restriction.
iii. If both product under Product Restriction, the whole order item CAN be checkout using the discount code.
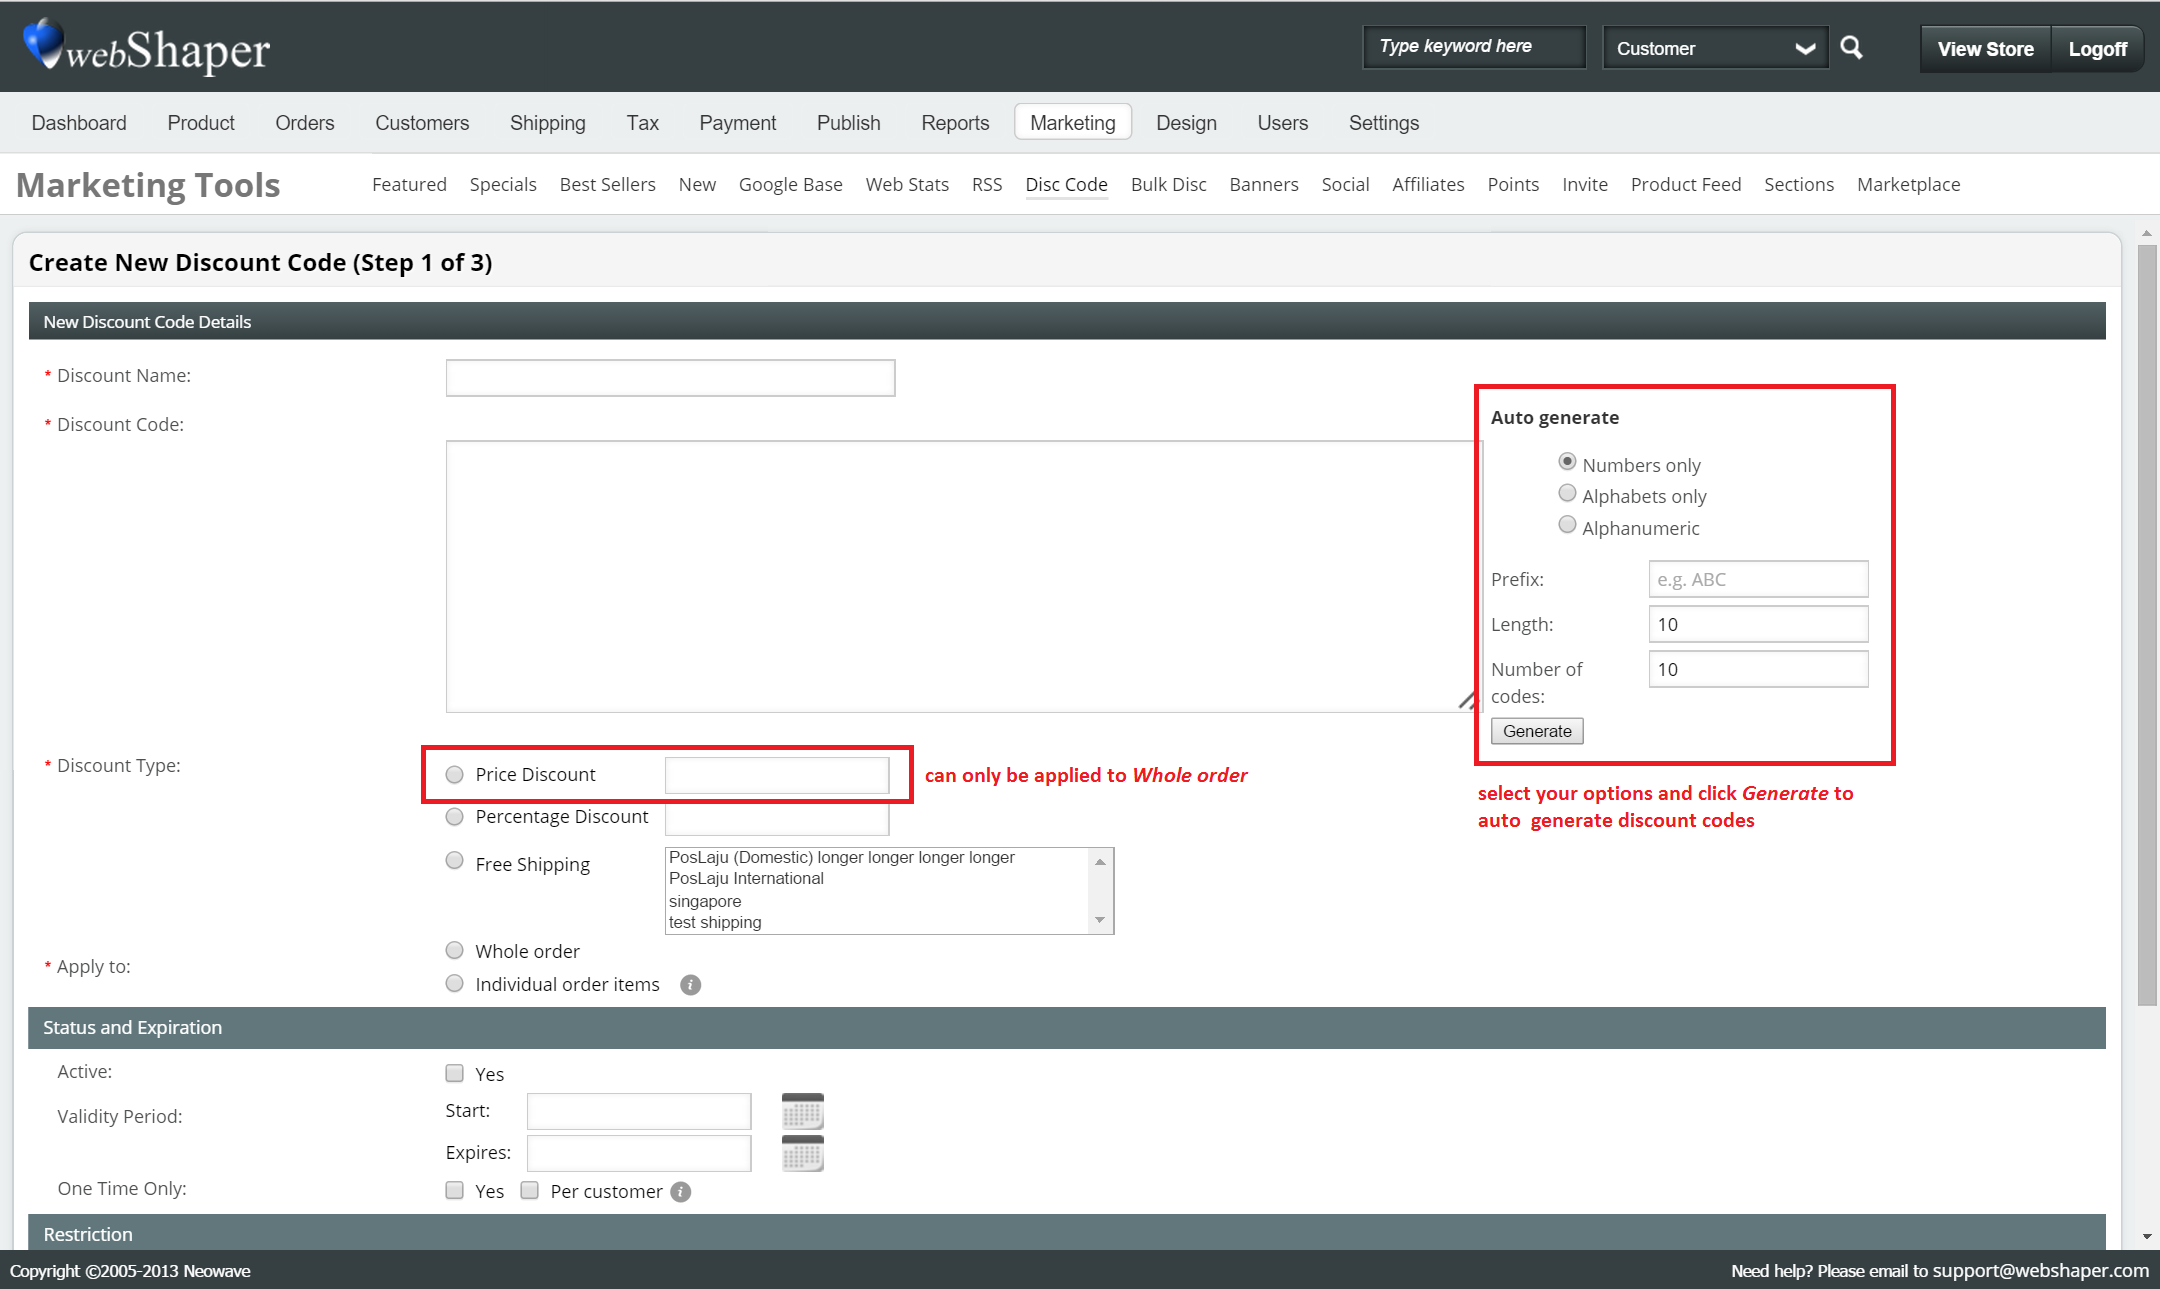
Note That : If you selected Percentage Discount, you can apply both Whole Order and Individual Order Item for Apply to.
If you have selected Price Discount / Free Shipping, you can only select Whole Order for Apply to.
7. The next step is to set up the Status & Expiration.
8. Check Yes to activate the discount code and choose your Start and Expires date for Validity Period.
9. For One Time Only, you can select whether your customer can only use the discount code once. Checking Per Customer means that one customer can only use the same code once.
Note that if you tick:
i. One Time Only: Customers are able to use this discount code only ONCE.
This means, you have to create many discount codes, so it is available to many customers.
ii. Per Customer Only: Allow ONE customer to use the discount code once or multiple times.
iii. Both One Time Only & Per Customer: Only ONE customer can use the discount code ONCE.
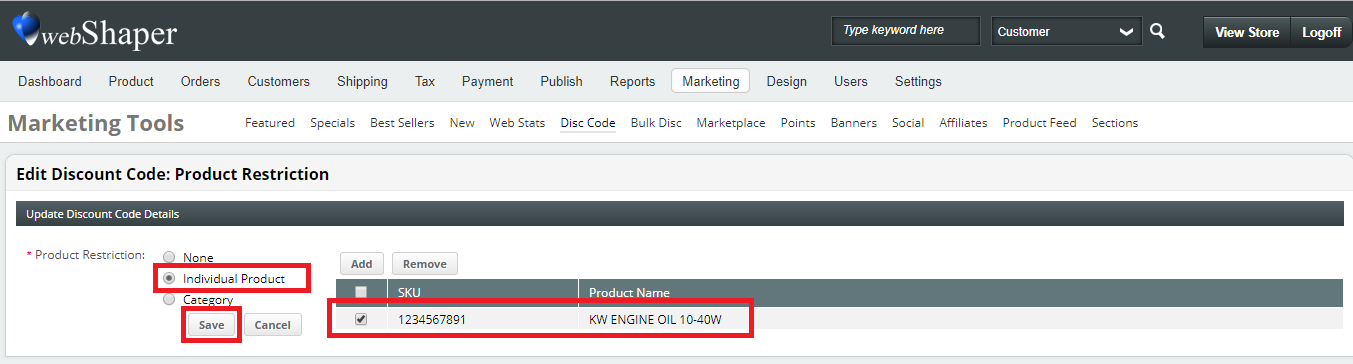
10. Under New Discount Code Details, you can set your Product Restriction either Individual Product or Category.
11. If you do not want any product restrictions for your discount code, just choose None and proceed by clicking Next.

12. For Individual Product, you can restrict your discount code for selected products only. The rest of the product listed will not be affected if they are not tick. Tick on the product that you want to set discount code, and click Save.
13. For Category, you can restrict your discount code to certain categories or subcategories. The rest of the category listed will not be affected if they are not tick. Tick on the category that you want to set discount code, and click Save.

14. The next part is Customer Restrictions. Only Restricted Customer can use this discount code.
Uncheck Yes for Customer Restrictions if you do not have any customer restrictions for your discount code and proceed by clicking Next.
15. Once done, you can send out discount codes to new or existing customers via emails, SMS or other channels.