
Setting printer is always challenging. We try our best to cover all of possible situations in this tutorial.
Before start, please check for the biggest paper size that your printer capable of. If you have no idea about that, you can simply count marks on your printer where you insert paper. Starting from 0 and every mark is an inch. Then check on the table below and read note on the category you fall under.
| Printer max print width | Note |
|---|---|
| 8 inches | - Only able to print Postlaju consignment note - Content will move to right 0.3-0.7 cm due to insufficient of width |
| 9 inches | - Will not have any problem on Postlaju - For consignment note bigger than 9 inches, change steps 8 and 15 as follow. 8. Specify width as 22.86 cm, for height remains actual consignment note size. 15. Do not tick on Choose paper source by PDF page size. - Content may move slightly to right |
| 10 inches or greater | - Should have no issue |
Let’s start
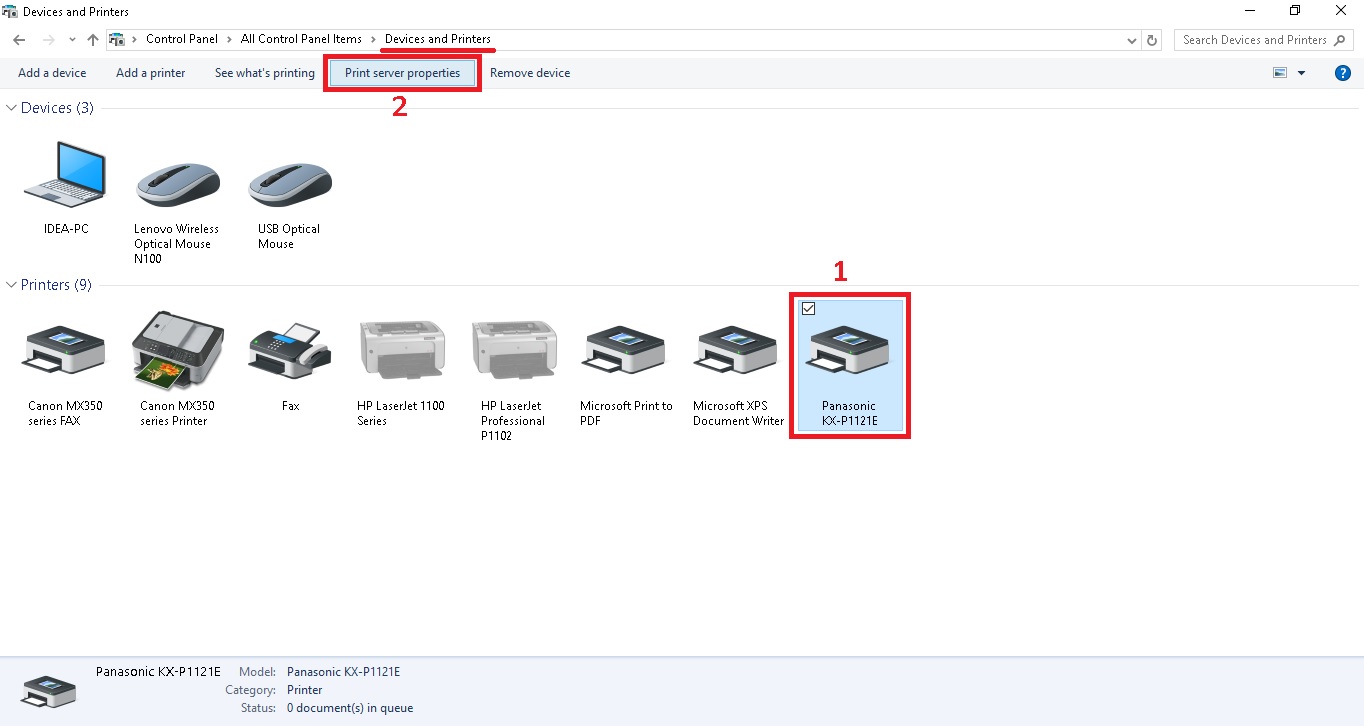
1. Go to your computer Control Panel
2. Click on Devices and Printer
3. Select on printer you want to use
4. Click on Print Server Properties
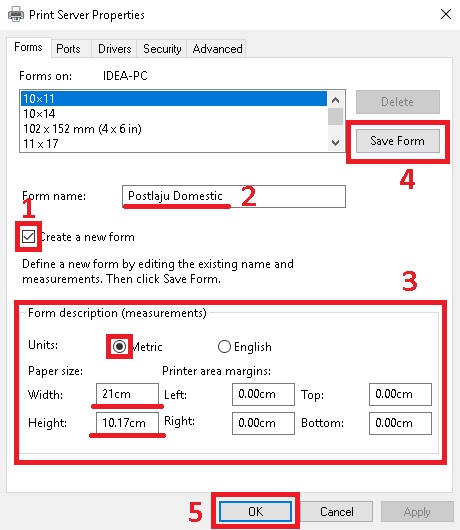
5. Tick on Create a new form
6. Put in form name
7. Tick Matric for Units
8. Specify width and height according to your consignment note size
Note: for 9 inches printer, specify width = 22.86
| Consignment Note | Width (cm) | Height (cm) |
|---|---|---|
| PostLaju Domestic | 21 | 10.19 |
| PosLaju International | 21.1 | 14 |
| Skynet | 24.2 | 10.12 |
| GDex | 24.2 | 10.12 |
9. Click on Save Form
10. Click OK
11. Open PDF file with PDF reader (Recommend: Adobe Reader)
Note: Using other software may have different setting procedures
12. Go to File and select Print… (or press Ctrl + P on keyboard)
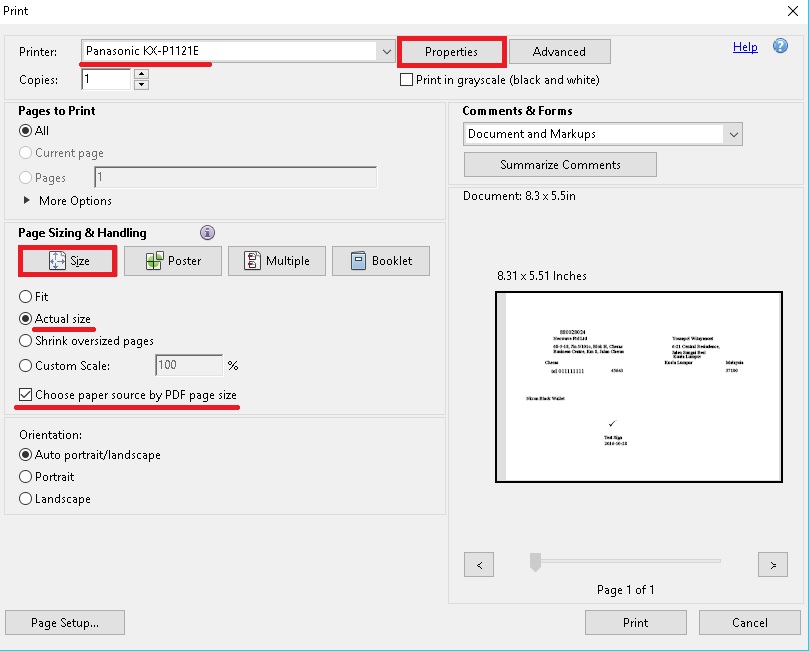
13. Select your printer for Printer:
14. Under Page Sizing & Handling section, Click on Size and select Actual size
15. Tick on Choose paper source by PDF page size
Note: for 9 inches printer, do not tick
16. Click on Properties
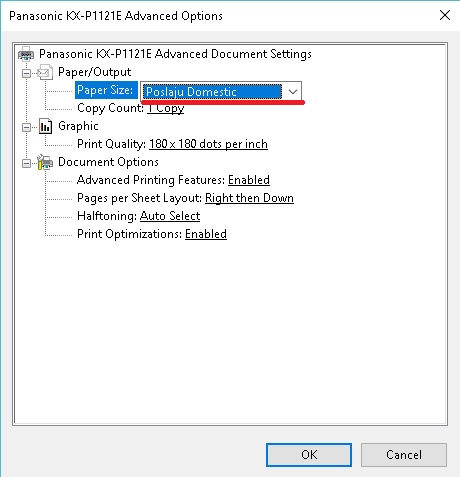
17. Under Paper/Quality tab, Click on Advanced… button
18. Choose paper size to the form you created earlier
19. Click on OK
20. Click on OK
You are ready to click Print button, but before that make sure you have your consignment note in the tray.